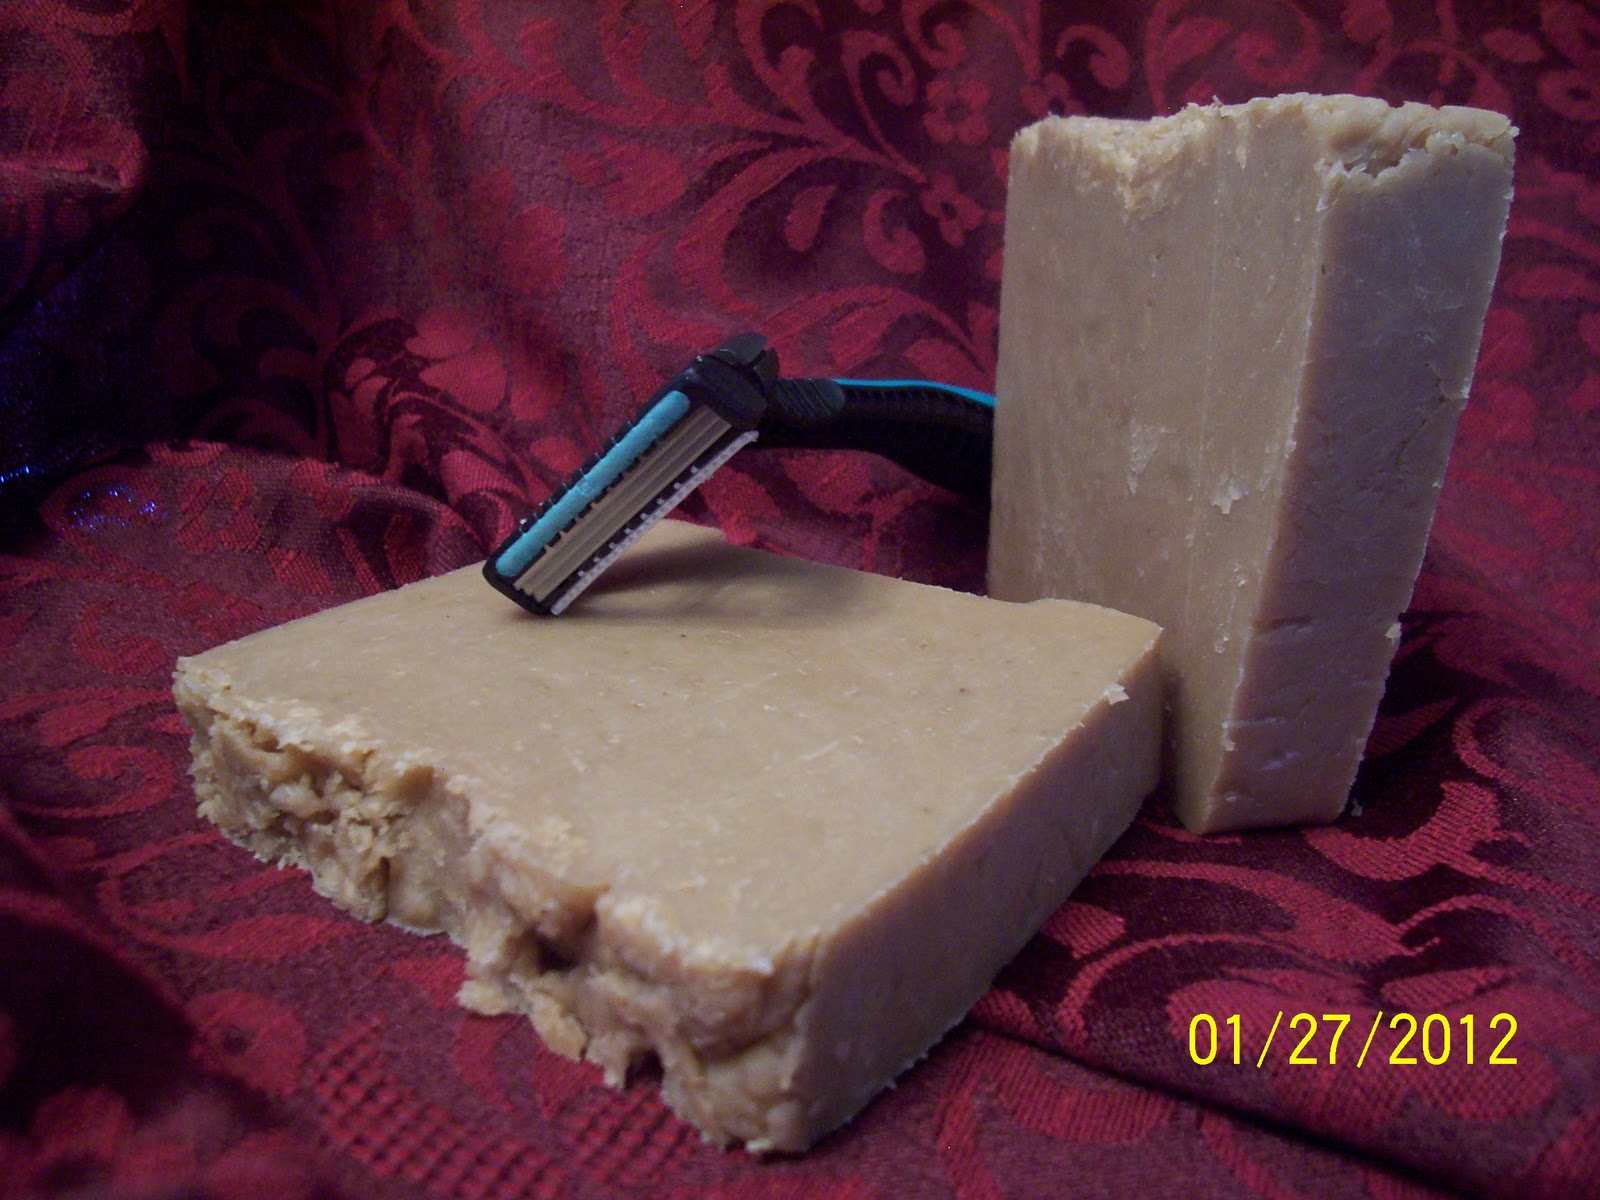
As a request I took on the task of developing a doggy soap. So, I researched and found a recipe I thought would do well, then tweaked it to my liking by adding different essential oils and infusing some teas. This dog soap is basically a Castile soap. The oils are made up of olive and coconut. I used nettle and chamomile teas in the lye solution. I discounted my water to 28% considering this is mainly an olive oil soap. Nettle is very much known for treating hair and scalp conditions, its good for all hair types. Chamomile is known for its anti-inflammatory properties and it also has antibacterial, antiviral, and anti-parasitic properties. I used essential oils of eucalyptus, sweet orange, citronella, and lemongrass. All of the essential oils add anti-fungal properties and the citronella and lemongrass add anti-parasitic properties. It also has finely shredded orange peel in it. This soap was hot processed, so it was already saponified when the essential oils were added thus keeping the benefits of the essential oils in the soap. It is theorized that with cold-processed soap that essential oils don't survive because the saponification process kills not only their scent, but their therapeutic benefits. I'm not licensed in Aromatherapy or am I a professional in Aromatherapy. I've done massive amounts of research. I have found mountainroseherbs to be very helpful with information regarding herbs and essential oils. Here is a picture and you will notice the pretty swirls the orange peel gave the soap and the pretty color the tea leaves gave. :)
This will take at least 2 weeks to cure and harden up. It smells wonderful! I'm so excited for my best friend to try this soap on her dogs and be my critic! I do hope that it helps with their itching and that "dog smell" that all dogs get. It should be wonderful!
And as recommended, anytime a shampoo-type bar soap is used on hair, dog or human, please follow up with a apple cider vinegar rinse. Soap is Alkaline between 8-10, so the apple cider vinegar will bring your hair back into normal pH. Here is one I use:
Brewed Nettle tea strong. I keep this in the refrigerator and use an old shampoo bottle. I fill the shampoo bottle 3/4 of the way with the nettle tea, then add 3 TB of apple cider vinegar. I use this as a rinse after shampooing and rinsing. I leave the rinse in my hair, but sometimes I rinse it out, just depends on what I'm feeling at the moment! :) The apple cider vinegar smell will leave once your hair is dried.
I think doggies and their parents will be very happy using this soap and making bath-time more enjoyable!
Happy Soaping! :)
Friday, February 3, 2012
Wednesday, February 1, 2012
We are having many laughs around here lately. Our second child Gabriella (aka Gabby) is learning to crawl and can move around pretty well. She can go from a crawling to a sitting position and vise verse. Well, in try to go from the sitting to the crawling position, she sometimes just falls over, then of course bangs her head on the floor. Not saying this is funny, but she then looks to see if someone saw her do that, then her reaction is by what your facial expression is. What's funny is that every time she bangs her head, we start clapping and go "Yay! Look what you can do!" and then she starts laughing and clapping. LOL. Here is a picture:
Had to show the love and how cute our little girl is! (No, I'm not biased! hehe)
Ugly Soap reformed!
Remember this soap, again? It has turned out to be an amazingly hard bar of soap. The fragrance oil caused it to turn more of a beige color rather than the pretty white you see in the pic, but it is still amazing. I've been using this on my face, actually using the bar of soap on my face, not lathering on my hands first, and the oatmeal is a great exfollient, the smell is nice and light and my face looks so much better. I can actually feel the oatmeal tightening my pores up. So today, I used this on both my kids during bath time. Gabby has had a little bit of a red bottom (from juice) and so I took this bar of soap and ran it under the water while the tub filled. It made the water like a little bubble bath, but also made it feel somewhat silky. This soap is so mild, I'm so impressed with it. I used it to bath my little ones in and it didn't burn their eyes. When I got Gabby out of the tub, her redness had decreased dramatically, again very impressed. I decided against selling this at first because the fragrance oil didn't leave the bar of soap a pretty white, but now I'm rethinking because it truly is a good bar of soap for kids and babies, even to just have to run under the water while the bathtub fills. If you're interested in trying, it's $3.00 plus s/h, no s/h if you are local. If you have little ones, this soap may be for them. It's 100% saponified handmilled olive oil with colloidal oatmeal and oatmeal, milk, and honey fragrance which is very light. :)
Monday, January 30, 2012
Honey Bee Soap
So, I finally was able to squeeze in a quick soap-making adventure. Of course, I love this hobby/craft, but its on the bottom of the priority list. Make it happen, right?
Since, I was short on time, and tired...I made a small batch that I knew would trace and cook fast...and it did.
Ingredients: Vegetable shortening, coconut oil, beeswax, lye, distilled water, honey.
Here's a picture of all the stuff you need:
(this picture was taken prior to starting the Castile Soap, but still gives you the idea)
*Your oils for your recipe
*Distilled water. This is debated among soapmakers. However, the more experience you get, the more you will realize how the difference in water can make your soap. If you can collect fresh rainwater, this is great for your soap. I like to use the purist I can get, which is distilled for me. I would think the lye would kill all the buggies and germies anyways, but I haven't researched it enough to know....so spend the $0.83 at WalMart and get a gallon of distilled. :)
*crock pot - size will determine how many pounds you are making. I have a large one and a small one :)
*silicone scraper
* glass or plastic measuring bowls/cups
*a seperate designated measuring cup for lye (mine is marked with black marker) and a designated measuring and mixing pitcher for the water (remember your lye will be mixing in this, so glass or dishwasher safe plastic only)
*an accurate scale
*100% lye
*a mold to put your soap in. I use an ice bin that is dishwasher safe, but even plastic storage containers could work or shoe boxes. I would advise with CPHP to oil the mold. Some people use mineral oil because it can't be saponified, but personally I use coconut oil. If using wood or shoe boxes, parchment or freezer paper will work just fine to line the mold.
*measuring spoons
*thermometer
*lye safety materials: apple cider vinegar to neutralize a spill, gloves, and goggles
*wooden spoon(s)
*stick blender (optional, but makes life much easier in soapmaking!)
First, caution about Lye. It is caustic and you will find horror stories regarding people messing with it. Always, always, always, treat it with respect. I do not mix lye around my children or have it within reach. When I'm not using it, it is stored, locked away from reach. This container has a child-safety type cap on it. Lye can be hard to find locally, most people have to order from the internet and before having it shipped to you, you have to fill out a special form, usually. Fortunately, I can get mine locally from Lowe's in the drain cleaning section. IT MUST SAY 100% LYE. Do NOT use Draino for soapmaking, it has other metals in it, and you're asking for trouble. I can usually get 2 lbs. for around $14.00. I know it's cheaper on the internet but 1) shipping is expensive, so it adds to the same price anyways 2) I don't have to wait for a shipment when I buy locally 3) I don't have to fill out a form. Always, pour the lye into your liquid, NEVER the other way around. If you do, you will be sorry with a dangerous mess on your hands. So just remember that, and don't test that one out! :) Here's a picture (and use a glass or plastic container to mix you lye solution, not aluminum...I also use a wooden spoon)
Wear rubber gloves and some old clothes. These gloves would be covering my arms (better yet, wear long sleeves) but I'm allergic to latex and it makes me itch like crazy, and these are latex gloves.....I know, get some non-latex gloves! haha....I normally mix my solution while its in an ice bath, but I forgot to get the bath ready with this one. Here's a picture of what I'm talking about.
Lye heats up to about 200 degrees F. You can see in this picture how hot it is, see the steam in the container? Also, lye lets off some nasty fumes, so keep your face away while mixing and even during the whole process. I use my vent over my stove to get rid of the fumes. You do NOT want to inhale these! Oh, and another note, wear safety goggles while messing with lye too! You will get splatters!
While the lye is chillin, start weighing and melting your hard oils. Must have an accurate scale. I mostly measure in ounces. My dear husband recently got me a baker's scale, that is digital (awesome!), tares (double awesome!), and measures in %, Gm, ounces and pounds. With soapmaking, everything must be weighed accurately.
Most people would melt the vegetable shortening first, then add the lye solution, bring to trace, then add the melted coconut oil and beeswax. Well, I'm not most people...you see the beeswax, but it was going to take too long, so I took it out and used my designated beeswax container and melted it in the microwave, so much faster! Then added it to the other oils once they melted. Beeswax will make your soap trace really fast!
Melted oils together:
Now I have my crockpot (smaller one, since this is a small batch) in the sink and I gave it a few stirs to finish melting the rest of the oils. I put it in the sink, in case I have a spillage. If you are able to plug it in and cook your soap in the sink like this, that would be good because occassionally, soap will volcano while cooking, and this is no fun to clean up because the lye is still caustic.
Pouring lye solution:
slowly! You could swirl your stick blender around (not mix yet!) to incooraporate it, but I chose the wooden spoon. Once all your lye solution is in, you can safely start mixing. I put the empty container in the adjacent sink next to me and run cold water in it.
See how quickly it changed color and started getting thick?
Next lets whip with our stick blender!
I whipped very, very shortly and was already at thick trace. Trace is when you can lift your mixer out of the solution and the drippings "trace" the top before settling back in its solution. Like pudding. Different oils will cause different tracings. Some oils will only trace very lightly and not come to a thick trace like this. Only experience will make you better aware of whats going on.
Put the crock on low and cook:
See the sides? This is only 10 minutes into the cook. It will bubble up the sides and turn over on itself. I check on mine about every 15 minutes, sometimes I stir, sometimes I don't, depends on what it looks like to me. If its completely turned on itself, I stir it up. Some will go through stages (sorry I don't have pics of this, yet) separation stage, applesauce stage, mash potato stage, and then Vaseline/waxy stage. You are done when your soap is waxy and shiny, looks like Vaseline. Then you can add your additives and fragrance. With fragrancing, I always let mine cool in the crock til about 140 degrees F. This will keep, especially your essential oils, from "heating off". Plus you won't need to use as much to fragrance. Once that's all done, mold it up!
I use an ice tray bin I found cheap at WalMart, its dishwasher safe so I knew it could withstand the heat of hot soap. Fill in layers and bang the mold on the counter to get the air bubbles out (anger management, right?), then cover with plastic wrap. I have the plastic wrap over the container to take the pic, but don't leave it like this because the steam will cause water droplets to fall from the plastic wrap onto your soap. I slide the plastic wrap down over the soap, and if I want a smoother top, I use the plastic wrap to do that, but if I want a wave-like-fluff on top, I just get the plastic wrap as close as possible to it without mashing my work down. All this does is allow your soap to cool evenly. You could leave it uncovered, it will just make the top cool quicker and give it a lighter color and sometimes, more brittle than the rest of your soap. Not a big deal, its what you preference.
Let it stand til its completely cool. I like to let mine sit overnight, if I think I can cut it the next day :) Just check on it.
Cut soap:
I let them dry out about a week before storing, sometimes longer if they still feel moist. I didn't have to add any fragrance to this because it smells naturally sweet. I did add honey after the cook, so with that and the beeswax, it smells honeylicious. :)
Now start soaping! :)
Since, I was short on time, and tired...I made a small batch that I knew would trace and cook fast...and it did.
Ingredients: Vegetable shortening, coconut oil, beeswax, lye, distilled water, honey.
Here's a picture of all the stuff you need:
(this picture was taken prior to starting the Castile Soap, but still gives you the idea)
*Your oils for your recipe
*Distilled water. This is debated among soapmakers. However, the more experience you get, the more you will realize how the difference in water can make your soap. If you can collect fresh rainwater, this is great for your soap. I like to use the purist I can get, which is distilled for me. I would think the lye would kill all the buggies and germies anyways, but I haven't researched it enough to know....so spend the $0.83 at WalMart and get a gallon of distilled. :)
*crock pot - size will determine how many pounds you are making. I have a large one and a small one :)
*silicone scraper
* glass or plastic measuring bowls/cups
*a seperate designated measuring cup for lye (mine is marked with black marker) and a designated measuring and mixing pitcher for the water (remember your lye will be mixing in this, so glass or dishwasher safe plastic only)
*an accurate scale
*100% lye
*a mold to put your soap in. I use an ice bin that is dishwasher safe, but even plastic storage containers could work or shoe boxes. I would advise with CPHP to oil the mold. Some people use mineral oil because it can't be saponified, but personally I use coconut oil. If using wood or shoe boxes, parchment or freezer paper will work just fine to line the mold.
*measuring spoons
*thermometer
*lye safety materials: apple cider vinegar to neutralize a spill, gloves, and goggles
*wooden spoon(s)
*stick blender (optional, but makes life much easier in soapmaking!)
First, caution about Lye. It is caustic and you will find horror stories regarding people messing with it. Always, always, always, treat it with respect. I do not mix lye around my children or have it within reach. When I'm not using it, it is stored, locked away from reach. This container has a child-safety type cap on it. Lye can be hard to find locally, most people have to order from the internet and before having it shipped to you, you have to fill out a special form, usually. Fortunately, I can get mine locally from Lowe's in the drain cleaning section. IT MUST SAY 100% LYE. Do NOT use Draino for soapmaking, it has other metals in it, and you're asking for trouble. I can usually get 2 lbs. for around $14.00. I know it's cheaper on the internet but 1) shipping is expensive, so it adds to the same price anyways 2) I don't have to wait for a shipment when I buy locally 3) I don't have to fill out a form. Always, pour the lye into your liquid, NEVER the other way around. If you do, you will be sorry with a dangerous mess on your hands. So just remember that, and don't test that one out! :) Here's a picture (and use a glass or plastic container to mix you lye solution, not aluminum...I also use a wooden spoon)
Wear rubber gloves and some old clothes. These gloves would be covering my arms (better yet, wear long sleeves) but I'm allergic to latex and it makes me itch like crazy, and these are latex gloves.....I know, get some non-latex gloves! haha....I normally mix my solution while its in an ice bath, but I forgot to get the bath ready with this one. Here's a picture of what I'm talking about.
Lye heats up to about 200 degrees F. You can see in this picture how hot it is, see the steam in the container? Also, lye lets off some nasty fumes, so keep your face away while mixing and even during the whole process. I use my vent over my stove to get rid of the fumes. You do NOT want to inhale these! Oh, and another note, wear safety goggles while messing with lye too! You will get splatters!
While the lye is chillin, start weighing and melting your hard oils. Must have an accurate scale. I mostly measure in ounces. My dear husband recently got me a baker's scale, that is digital (awesome!), tares (double awesome!), and measures in %, Gm, ounces and pounds. With soapmaking, everything must be weighed accurately.
Most people would melt the vegetable shortening first, then add the lye solution, bring to trace, then add the melted coconut oil and beeswax. Well, I'm not most people...you see the beeswax, but it was going to take too long, so I took it out and used my designated beeswax container and melted it in the microwave, so much faster! Then added it to the other oils once they melted. Beeswax will make your soap trace really fast!
Melted oils together:
Now I have my crockpot (smaller one, since this is a small batch) in the sink and I gave it a few stirs to finish melting the rest of the oils. I put it in the sink, in case I have a spillage. If you are able to plug it in and cook your soap in the sink like this, that would be good because occassionally, soap will volcano while cooking, and this is no fun to clean up because the lye is still caustic.
Pouring lye solution:
slowly! You could swirl your stick blender around (not mix yet!) to incooraporate it, but I chose the wooden spoon. Once all your lye solution is in, you can safely start mixing. I put the empty container in the adjacent sink next to me and run cold water in it.
See how quickly it changed color and started getting thick?
Next lets whip with our stick blender!
I whipped very, very shortly and was already at thick trace. Trace is when you can lift your mixer out of the solution and the drippings "trace" the top before settling back in its solution. Like pudding. Different oils will cause different tracings. Some oils will only trace very lightly and not come to a thick trace like this. Only experience will make you better aware of whats going on.
Put the crock on low and cook:
See the sides? This is only 10 minutes into the cook. It will bubble up the sides and turn over on itself. I check on mine about every 15 minutes, sometimes I stir, sometimes I don't, depends on what it looks like to me. If its completely turned on itself, I stir it up. Some will go through stages (sorry I don't have pics of this, yet) separation stage, applesauce stage, mash potato stage, and then Vaseline/waxy stage. You are done when your soap is waxy and shiny, looks like Vaseline. Then you can add your additives and fragrance. With fragrancing, I always let mine cool in the crock til about 140 degrees F. This will keep, especially your essential oils, from "heating off". Plus you won't need to use as much to fragrance. Once that's all done, mold it up!
I use an ice tray bin I found cheap at WalMart, its dishwasher safe so I knew it could withstand the heat of hot soap. Fill in layers and bang the mold on the counter to get the air bubbles out (anger management, right?), then cover with plastic wrap. I have the plastic wrap over the container to take the pic, but don't leave it like this because the steam will cause water droplets to fall from the plastic wrap onto your soap. I slide the plastic wrap down over the soap, and if I want a smoother top, I use the plastic wrap to do that, but if I want a wave-like-fluff on top, I just get the plastic wrap as close as possible to it without mashing my work down. All this does is allow your soap to cool evenly. You could leave it uncovered, it will just make the top cool quicker and give it a lighter color and sometimes, more brittle than the rest of your soap. Not a big deal, its what you preference.
Let it stand til its completely cool. I like to let mine sit overnight, if I think I can cut it the next day :) Just check on it.
Cut soap:
I let them dry out about a week before storing, sometimes longer if they still feel moist. I didn't have to add any fragrance to this because it smells naturally sweet. I did add honey after the cook, so with that and the beeswax, it smells honeylicious. :)
Now start soaping! :)
Sunday, January 29, 2012
Ugly soap! LOL
Well, there have only been a hand-full of times where my recipe for a soap didn't turn out very well. Like any soapmaker can tell you, sometimes you can follow a recipe exactly and it still doesn't end up, um....pretty. So, I attempted a CPHP 100% Olive Oil Castile soap and it wasn't even my recipe. I usually use soapcalc for my recipes in formulating, but this one I found in an ebook. Side track note, ALWAYS USE A SOAP CALCULATOR! ALWAYS!! Tell me how I know this! HA! Well, when I dive in, I dive in....first off, 100% Olive Oil Castile soap takes FOREVER to trace, like an hour of stickblending, which isn't fun when your stick blender gets hot and you have to let it rest. Needless to say, the next time I decide to do this, I will definitely decrease the water, and superfat to probably 7%. I find alot of my advice from http://soapmakingforum.com/. Any-who, I couldn't get the soap to gel, it went through the separation phase, applesauce phase, and then the mash potato phase. Each stage took forever, and I actually stick blended again between the applesauce and mash potato phase because it was taking so long. After about 4 hours of cook, I put the crock pot on keep warm and went to bed, it was 1am! Got up when hubby did for work (4:30am!), checked on it and still mash potato phase. Put it up to low and let it cook another hour, still the same. Tried to stick blend again, and it just got to thicker mash potato phase.....whatever, I molded it! By this time, my patience had worn thin. Then, to my surprise, it hardened rather quickly! Hardened enough to unmold and cut, but it looks like dry-wall....lol....ugly, very ugly. So, in conclusion of my disastrous, adventurous, and patient-killing attempt to do a pure 100% Olive Oil Castile soap is partial failure. I'm going to let it cure for a while, like a month, and see where we're at. When cutting it, it stung, so definitely wasn't done cooking. Will definitely make some changes the next time around. And will definitely NOT sell this, will use it myself either for dishes or laundry detergent. No soap goes waste....it really is hard to ruin a batch so bad that it has to be dumped! To show my shame, here are what the bars look like. Enjoy your laugh! LOL
Saturday, January 28, 2012
Tonights soap-pot
Lord Willing, tonight I will be making a batch of soap to add to my inventory. In the process, I will try to post some pictures of the process and how I make my soap. Maybe even some lotion too :) I recently got a new batch of essential oils and fragrance oils in and excited to use them! Just so you know, my business will be open soon. Follow me as I make my inventory, and if anything speaks to you to try, let me know! Here are some pics of what I have so far :)
Ingredients: Distilled water, Pure Olive Oil, emulsifying wax, stearic acid, Vitamin E oil, Optiphen Plus (paraben and formaldihyde free preservative), Sweet Orange essential oil, Vanilla extract
My best ever shaving soap for men (and women, too!). Ingredients: Extra Virgin Olive Oil, tallow, palm oil, coconut oil, buttermilk, sodium hydroxide, chamomile tea leaves, betonite clay, castor oil, sweet almond oil, essential oils of bergamot, lavender 40/42, and clove. This has a wonderful earthy-woodsy aroma and the betonite clay gives it that "slip" for shaving, while the essential oils adds wonderful skin qualities
Ingredients: Tallow, Palm oil, coconut oil, distilled water, and sodium hydroxide (lye), and fragrance. My standard recipe, long lasting with plenty of bubbles, and won't leave your skin feeling dry. :)
The beginnings...
Well, here I am! FINALLY composing a blog. Here are the beginnings of a new path for me. Not really seeking for this path, but kindly given to me to embrace. I started this path over a year ago when I became pregnant with my 2nd child. When my husband I first found out we were pregnant again, we were elated! We had been trying for 19 months! God decided to reward us with another blessing! Our first child, a son, who is getting ready to turn 6...*does the blink with unbelief*....was not a pleasant labor and delivery in the hospital, so when I got pregnant with Gabriella (aka Gabby), I became petrified. Anxiety and fear started settling in.....even though I'm a nurse and work PRN (as needed) in a hospital, I don't like OB wards! So, we researched. With not having many choices in my area, I needed to at least see if the baby was ok and there was a heartbeat, so we saw an obstetrician. One who was highly recommended by my friends....ok feeling good. We go to our first appointment, and of course, we spend 45 minutes with the payment coordinator before even seeing the doctor. Then, we see the nurse who says "pee in this cup and change into the gown on the table." Ok. Ya know, its not fun sitting on a cold table pretty much naked with a paper gown, waiting on a complete stranger to come look at you? What's wrong with this picture? Ok....get the soapbox name now? Haha. All the meantime, my dear husband is leaning up against the wall. Finally, the doctor comes in (I do have my socks on by the way, so I guess not completely naked!)....brief introduction, honest (I think) handshake to Eric.....and, then I was pretty much man-handled! I felt violated almost and actually apologized to my husband that he had to see that. Papsmears and breast exams aren't fun to begin with, but c'mon! After that appointment, we said "there has to be a better way." So, jumping ahead, we decided on a homebirth. And, it was beautiful. We found beautiful midwives who took such good care of me, making sure nutrition and exercise were key. On 6/11/11 we had a beautiful baby girl born to us in water. I will have more on this in a whole other post. What I want to hit on, was during my pregnancy, my skin got so sensitive, I literally couldn't use anything. Everything broke me out or made me itch. So, after spending $ we didn't have in trying more products that didn't work, I decided to make my own. First was my laundry detergent. After a few tweaks, we are still using homemade laundry detergent today. I love it! Well, this still didn't clear up my skin or help my itching, but it did save me alot of money! This was what opened the can of worms people! I started researching and experimenting.....then whoa, I can make toothpaste, dishsoap, dishwasher detergent, deodorant, and my own lotion! Then onto soapmaking, ahhhhhh! I fell in love! I knew everything that was going into my product! Then, we decided to cloth diaper, then woah! I can sew that? Yes, yes I can. Talk about being frugal! I was not working part-time anymore, we were getting ready to embrace a new little gift, and preparing to start homeschooling Tyler for Kindergarten. Two HUGE changes in lifes balance and activities of daily living. So, learning how to truly save us money and recycle what we already had on hand were huge pluses! I use to be a huge couponer; however, that frizzled out when realistically it wasn't possible for me to be running to 3-4 stores to save $20 on my grocery bill. Plus the coupons were drastically getting worse in the nature of savings. I still coupon, but not like I use to. Ok, stearing back (yes, I drift in my thoughts!), I LOVE soapmaking. I have been formulating over a year using the CPHP (crock pot hot process) method. The same goes for my lotion. I actually started making lotion before I started making soap. I make a very good lotion and a very good soap, if I say so myself. So, here I am, over a year later, and taking things to a different level. Selling. So, here are to beginnings...welcome to my soapbox!
Subscribe to:
Posts (Atom)